Friday, July 25, 2014

Simply Fresh Pea Soup


I love peas. I think part of my obsession with peas is their color. Green is my favorite color! These tiny emeralds are just simply delicious. They have a wonderful sweetness and a pop texture which is quintessential pea. I normally use frozen peas when cooking, it's the only way to have delicious peas all year long. Frozen vegetables get a bad rap, but if you want a vegetable out of season and at the peak of its perfection, frozen veggies are the way to go. These veggies are picked at their best then frozen providing perfect veggies all year round.

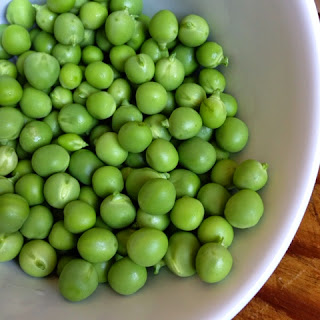
Even though I use frozen veggies for cooking, I look for fresh veggies when in season, so when I saw this wonderful pile of fresh peas, I needed to get some! I wanted to use these peas in a dish that was going to celebrate their delicate sweetness and bright green color. I wanted peas to be the star! Pea soup was the best choice.

This soup is not only yummy but so simple! You only need 5 ingredients. The peas, onion, broth, sour cream, butter. You could have this meal done in about 15-20 minutes. It's a great quick weekday meal.

I know it's summer and it's hot and the last thing anyone wants to eat is something hot, but the beauty of this soup is that it can be enjoyed chilled. Whether cold or hot, this soup honors the simple pea showing off it's delicate sweetness and nature's rich green hues.

Buen Provecho!

Main Players

Melt butter. Add onions. Cook 4-5 minutes There is flavor in the brown!

Add chicken broth, bring to a boil.

Add peas to boiling broth. Cook for 2-3 minutes.

Peas will rise to the top and they will be bright green. Take off heat immediately.

Blend soup in blender until smooth, return to pot and add sour cream. Look how beautiful it looks!

My favorite way to eat soup, edible bowl!!!

Look at that wonderful green!!!

Optional garnish with heavy cream. Yum!

Fresh Pea Soup- 4 small appetizers or 2 entrees

Ingredients:

2 cups shelled peas or thawed frozen peas
1/2 onion, minced
2 cups chicken broth
1/4 cup sour cream
1 Tbsp Butter
Salt n Pepper, to taste
Heavy Whipping Cream (optional garnish)

Road Map:

1.  Place a heavy bottom stock pot on medium heat, add butter. Once butter melts down add minced onions, salt and pepper to taste. Cook for 4-5 minutes, until onions are a bit caramelized.

2. Once onions have softened and brown add chicken broth. Bring broth to a boil.  Add peas to boiling broth. Cook for 2-3 minutes, until peas are bright green and tender. Remove immediately from heat.

3. Using a blender, puree soup until completely smooth. Work in batches if necessary. Once blended smooth return to pot and stir in sour cream. Taste and add salt n pepper if necessary.

4. If serving warm, heat soup to simmer and turn off heat. If serving chilled, place soup in a container and refrigerate for an hour. If you want to glide the lily, garnish soup with a drizzle of whipping cream.

5. Enjoy!

Side Note: If you want more of a silky texture pour soup through a sieve. I enjoy the different texture in the soup so I skip the sieve. If you want to make this completely vegetarian use vegetable broth instead of chicken both.  Make it your own. :)

Tuesday, July 22, 2014

Krispy Kreme Burger


I know that I'm years behind on this trend, but I've always been curious about this unusual pairing. I just never had both items around the house at the same time. Because of the ridiculous calories this burger would entail, I just couldn't see myself seeking it out, despite my curiosity. So how did this moment come? It went down like this....

We found a Groupon for Krispy Kreme, bought it, got them and have a lot leftover. We had ground meat in the fridge, already defrosted (for a different meal), just needing to be cooked.  Serendipity,  Krispy Kreme and Ground Beef under the same roof at the same time. I couldn't ignore this opportunity so here we go.....

I made a basic burger. No frills, no extras, a simple cheeseburger. Meat, cheese, tomato, lettuce. I wanted to be able to taste all the different components.

I mixed the meat, with McCormick's Montreal Steak Seasoning and Worcestershire Sauce. This combo is my go to quick meat seasoning, I put it on basically every meat dish. Add a little salt and pepper and that's it. Pretty simple.

I shape the burgers, cook them 4-5 minutes on each side. To melt the cheese I add a bit of water into the pan and cover immediately. The water creates a steam that melts the cheese evenly. A little diner tip I picked up on Food Network. It works every time!

Cut the donut in half with a serrated knife, place burger on bottom bun, lettuce, tomato and then top.  What you end up with is a crazy good All American Burger. The sweet and savory mix that this burger brings, is distinct and delicious. The tomato and lettuce gives it the freshness it needs to offset the richness of the bun.  The burger is a little sticky but that's just part of the experience. This burger is juicy, savory, sticky, a bit sweet and fresh. It's never to late to have a Krispy Kreme Burger.

Buen Provecho!

Main Players

In a bowl mix ground meat, steak seasoning, Worcestershire sauce, salt & pepper.

Form into 4 patties.


Form patties, making sure each one is thinner at the center and thicker at the edges for even cooking.

Cook for 4-5 minutes on each side.

In the last 1-2 minutes of cooking, add the cheese. Pour a bit a water into the pan.

Cover immediately, allowing the water to create steam ensuring evenly melted cheese.

Melted perfection!

Split buns with serrated knife.

Time to eat!!!

Krispy Kreme Burger - Yield 4 burgers

Ingredients:

1lb ground beef
3-4 Tbsp Montreal Steak Seasoning, or your favorite seasoning
2Tbsp Worcestershire Sauce
Salt n Pepper
4 Krispy Kreme original glazed, split
4 American, slices
Lettuce
Tomato

Oil, for pan frying

Road Map:

1. In a medium bowl mix together ground beef, montreal seasoning, worcestershire & salt n pepper. To ensure proper seasoning roll up a small piece into the size of a quarter and cook. Adjust seasoning if necessary.

2. Add oil to a medium pan on medium heat.

3. Divide meat into 4 equal pieces. Form patties, making sure each one is thinner at the center and thicker at the edges for even cooking.

4. Cook 4-5 minutes on each side. Top each patty with cheese during the last 1-2 minutes of cooking. Pour a splash of water into the pan and immediately cover to help the cheese melt evenly. 

5. Using a serrated knife split the donuts in half. Assembly burger. Bun, Burger, Lettuce, Tomato, Bun. 

6. Enjoy!!!

Monday, July 21, 2014

A Taste of El Salvador : Semita


El Salvador is the country of my heritage. I am first generation American. It was wonderful growing up and having 2 cultures. I learned the Salvadorean culture from my parents and the American culture from everywhere else. My parents brought me to El Salvador when I was very young and sadly I don't have any memories. I haven't had the opportunity to visit again so the only way for me to experience a little bit of my heritage is through food. When family would come and visit us they would bring us two things, cheese & semita.

Semita is a jam filled or sugar cane filled pastry. The jam traditionally used is pineapple, but you can add any jam filling you want, you can customized to your taste. I didn't have pineapple filling so I used brown sugar and add a couple of spices, cinnamon & cardamon.

Semita comes in 2 forms, alta & pacha. Alta is thick almost a cake like version while the pacha is a flat thin version. I prefer the pacha version. I searched for days to find a good semita recipe. It was not an easy search. I finally found one at salvadorianrecipes.com. Their recipe was the closest that I could get to a true semita. The dough bakes up a bit more crispy than a true semita but it still has the same taste and I actually prefer the crisper crust.


This semita has a crispy top and soft inside and it's filled with sweet gooey goodness that would satisfy any sweet tooth.

Try this delicious Salvadorean treat with a cup of coffee or tea.

Buen Provencho!


Place all ingredients in a bowl. Combine. Dough will be sticky.

Knead dough on a floured surface until dough is smooth and no longer sticky.

Roll out 1/2 of the dough to 8x11. Place dough in parchment lined baking sheet. Trim if necessary.

Add sugar mixture or jam filling to dough.

Roll out other 1/2 of dough and place on top and decorate with leftover dough.

Create long strains and decorate with a criss-cross pattern or any design you like.

Customize your design! Sprinkle sugar on top. Preheat oven to 350.

Bake at 350 for 20-30 minutes or until golden.

Semita Salvadorean - adapted from salvadorianrecipes.com

Dough:

2 cups flour
1 Tbsp yeast, rapid acting
1/2 cup sugar
1 stick butter, softened
2 eggs
pinch of Salt

sugar for dusting

My Filling:

1-2 cups brown sugar
1 Tsp cinnamon
1 Tsp cardamon

Side Note- You can use any jam filling or dulce de panela (a hardened natural unprocessed sugar cane found in most Latin markets).

Road Map:

1. In a bowl add flour, butter, yeast,  sugar, eggs and salt. Mix ingredients with your hands. Dough will be sticky.

2. Place dough on floured surfaced. Knead dough until it is shiny and no longer sticks to your hands and is easy to work with.

3. Put dough into bowl, cover and place in a warm place and let it rest & rise for 2 hours.

4. In the meantime prepare the baking sheet and filling. Grease an 8 x 11 pan or line with parchment. Combine filling ingredients and set aside. 

5.  Pre-heat the oven to 350 degrees for about 15 minutes before baking

6. After 2 hours, divide dough into 2 disk, use a scale to get equal pieces. Roll out 1 disk on a floured surface to fit the pan. Place first dough on pan and trim. Spread brown sugar mixture or your jam choice all over dough.

7. Roll out the other half of dough and place on top of filling. 

8. Decorate with leftover dough. Roll out long, tin string and place over top in a criss cross pattern. Sprinkle with sugar.

9. Bake for 20 -30 minutes or until golden brown. Let it cool before serving.

10. Enjoy!

Friday, July 18, 2014

Chicken Katsu

My husband and I love eating from our local L&L Hawaiian Barbecue. If you're not familiar with it, it's a chain restaurant that serves up local Hawaiian dishes. One of my husband's favorite lunch plates is Chicken Katsu. What's not to love?! It's juicy, crispy and served with a delicious sweet & tart sauce. I love their Katsu sauce, you'll learn that I'm a BIG sauce fame. I would be happy with a bowl of practically any sauce and some bread. Returning from that white rabbit hole, Chicken Katsu is simply a Japanese style fried chicken. There is no brine, soaking or deep frying involved, like Southern fried chicken, but the end result is still crispy chicken that's delicious.

Hawaii is known for their lunch plates. The plate consists of a protein, rice and macaroni salad. It's probably not the healthiest in the world, but it's oh so delicious! So to stick with tradition, I'm serving it up Hawaiian style. No need to fix what's not broken.  Aloha!

Cut off excess fat. Salt & Pepper chicken on both sides.

Prepare breading station

Flour, tap off excess.

Dip in egg, tap off excess.

Cover well in panko. We want it crispy!

Add to oil. When putting in oil place away from yourself to avoid oil splattering on you.

It's getting there!

Almost...

Golden brown and delicious!

Come and eat!


Buen Provecho!

Chicken Katsu - yields 4 servings

Ingredients:

4 Thigh, skinless boneless
1/2 cup flour
1 Egg
1 cup Panko
Salt n Pepper
Oil for pan frying

Katsu Sauce:
1/2 cup Ketchup
1/4 cup SoySauce
1/4 cup Sugar
2 Tbsp Worcestershire Sauce

Road Map:

1. Make sauce. Combine Worcestershire sauce, ketchup, sugar & soy sauce.

2. Heat oil in a pan.

3. Set up breading station. Add flour, whisked egg and panko in separate plates/bowls.

5. Salt & pepper chicken on both sides. Bread chicken in flour, egg then panko.

6. Pan fry chicken, cooking 4-5 minutes on each side or until golden brown, making sure chicken is cook through.

7. Serve with rice, macaroni salad and katsu sauce.

8. Enjoy! 


Thursday, July 17, 2014

Deep Fried Spam Musubi

Yes, that's right, your eyes aren't deceiving you!  It not just spam musubi but deep fried spam musubi! Spam Musubi on it's own is completely delicious. The salty spam, vinegary seasoned rice, the sweet teriyaki sauce with that touch of nori is so unbelievably awesome. It makes me drool! So you can imagine how giddy I got when I read on a menu Deep Fried Spam Musubi.

I first have this delicious treat at  Da Kitchen Cafe in Maui. They're known for this special dish. It was such a wonderfully executed dish, that I dream about this musubi!  It had all the attributes of a traditional spam musubi, but now it's crunchy & crispy. It elevates this humble Hawaii favorite into a more special treat.

It's been 2 years since I've had this salty treat. I been quite deprived. Since I can't justify a plane ticket just for deep fried spam musubi, I must make my own. I've never made musubi, so I asked a dear friend to talk me through the basics, she even let me borrow her musubi press. You don't need this press, you can totally used the Spam can as a substitute. She's never deep fried a musubi, so that part I had to play by ear. It turned out to be super simple, don't let the amount of steps fool or scare you.

Now if you don't want to deep fried every piece of musubi,  you can wrap the musubi with nori in different ways. You can wrapped in a whole sheet of nori. You can cut the nori in strips and use 1 strip per musubi or if you're my husband you opt for no nori. He's just not a seaweed eater so I also omit the furikake seasoning, so I adjust tradition for him. Even without the seaweed it still was yummy, but for me the nori gives a delicious sea flavor that is part of the magic of spam musubi. Now if you are deep frying you need to wrap the musubi in the whole sheet and let it set in the fridge. These steps are important to help keep it's shape and to prevent the rice from coming apart. 

I hope you take this trip down memory lane with me and enjoy a taste of Hawaii. Aloha!

Buen Provecho!

Combine equal parts soy sauce & sugar. Reserve a 1/4 cup of sauce.

Cut into 8-10 pieces

Marinade spam with sauce for at least 5-10 minutes.

If you don't have a musubi press you can make one out of the can. It's a little tricky and takes a bit of time. I used a can opener and scissors. I add the foil on the bottom to protect from some sharp edges. BE VERY CAREFUL!

Cut nori strip and place can on top of nori.

Season rice with seasoned rice wine vinegar.

Pan fry spam.

Press rice until compact.

Sprinkle a little furikake & drizzle a bit of the reserved sauce.

Add a slice of spam.

Add rice, press, wrap with nori. Seal with a bit of water.

If using press, place press on top of nori.

Add rice, press, sprinkle furikake, drizzle sauce, spam, rice, press. I put a piece of plastic wrap between the rice and press, it makes it keeps from the rice to sticking to the press.

Nicely press! Look at that beauty!

Seal and wrap in plastic wrap. Place in fridge for 30 minutes to 1 hour.  Allow it to set.

Prepare breading station.

Dip in egg then cover in panko.

Fry until golden brown.

Perfection! Look at the golden brown goodness!

Salty, sweet and amazingly crunchy!! Enjoy! Aloha!

Deep Fried Masubi - yields 8-10 musubi

Ingredients:

1 can Spam, sliced into 8 to 10 pieces
3 cups Cooked Rice, warm - 1 cup uncooked rice & 2 cups water
1-2 Tbsp Seasoned Rice Wine Vinegar, to taste
1/2 cup Soy Sauce
1/2 cup Sugar
Furikake, japanese rice seasoning
4-5 Nori sheets (roasted seaweed), if wrapping in whole sheet, 3 sheets are enough if cutting 2 inch strips
1 Tbsp oil

For deep frying:
1 egg
1 cup panko crumbs
Oil for frying

Side Note: Furikake & Nori sheets can be found readily in Asian markets or in the Asian aisle in big supermarkets.

Road Map:

1. Cook the rice.

Take 1 cup of uncooked rice and rinse several time until water is clear and no longer cloudy. In a medium, heavy-bottomed pot add the cup of rice and 2 cups of water. Bring to a boil. Once it comes to a boil and add salt to taste. Stir to combine the rice, lower the heat to low and cover. Let the rice cook for about 15- 20 minutes, until all the water has been absorbed. Remove form heat and let it rest for a few minutes. Take a fork and fluff the rice.  Mix in rice wine vinegar to rice, to taste. You want more sweet than sour.

2. Slice Spam into 8 to 10 pieces. 

3. Combine soy sauce & sugar into a bowl. Reserve 1/4 cup of sauce.  Place spam in remaining marinade for about 5 minutes.

4. Put a sauce pan on medium heat, add 1 tbsp of oil and pan fry the spam. Add some of the marinade to coat spam and thicken sauce. Cook until spam is caramelized.

5. Place a whole sheet of nori down. Place musubi press on top, or your Spam can. If using spam can or a small musubi press you can cut the nori in half to make it easier to make the musubi.

6. Add rice and press down until you have 1/4 inch of rice, or however tall you like.

7.Sprinkle furikake on rice.

8. Add a drizzle of the reserved sauce, this step is optional. I like the extra sweetness.

9. Place a slice of Spam on top and add another mound of rice. Press down to compact the rice. Remove press/can. Wrap the spam, using a bit of water to seal the edges. Ready to eat and enjoy!

If deep frying keep going:

10. Wrap ready made musubi in plastic wrap and place in the fridge for at least 30 minutes to 1 hour, enough time for the rice to set up.

11. Prepare oil. Heat oil in a heavy bottom pot.

12. Prepare breading station. Place whisked egg and panko in separate dishes/bowls.

13. Place musubi in egg and then in panko. Make sure it is completely covered in panko for a crispy exterior.

14. Fry until golden brown. Drain on a paper towel. When cool to touch, using a serrated knife cut diagonally. Enjoy!